Get started
If you have experience building apps for Apple platforms, like iOS, adding code to Tuist shouldn’t be much different. There are two differences compared to developing apps that are worth mentioning:
The interactions with CLIs happen through the terminal. The user executes Tuist, which performs the desired task, and then returns successfully or with a status code. During the execution, the user can be notified by sending output information to the standard output and standard error. There are no gestures, or graphical interactions, just the user intent.
There’s no runloop that keeps the process alive waiting for input, like it happens in an iOS app when the app receives system or user events. CLIs run in its process and finishes when the work is done. Asynchronous work can be done using system APIs like DispatchQueue or structured concurrency, but need to make sure the process is running while the asynchronous work is being executed. Otherwise, the process will terminate the asynchronous work.
If you don’t have any experience with Swift, we recommend Apple’s official book to get familiar with the language and the most used elements from the Foundation’s API.
Minimum requirements
To contribute to Tuist, minimum requirements are:
- macOS 14.0+
- Xcode 16.3+
Set up the project locally
To start working on the project, we can follow the steps below:
- Clone the repository by running:
git clone git@github.com:tuist/tuist.git - Install Mise to provision the development environment.
- Run
mise installto install the system dependencies needed by Tuist - Run
tuist installto install the external dependencies needed by Tuist - (Optional) Run
tuist auth loginto get access to the Tuist Cache - Run
tuist generateto generate the Tuist Xcode project using Tuist itself
The generated project opens automatically. If you need to open again without generating it, run open Tuist.xcworkspace (or use Finder).
XED .
If you try to open the project using xed ., it will open the package, and not the project generated by Tuist. We recommend using the Tuist-generated project to dog-food the tool.
Edit the project
If you needed to edit the project, for example to add dependencies or adjust targets, you can use the tuist edit command. This is barely used, but it's good to know that it exists.
Run Tuist
From Xcode
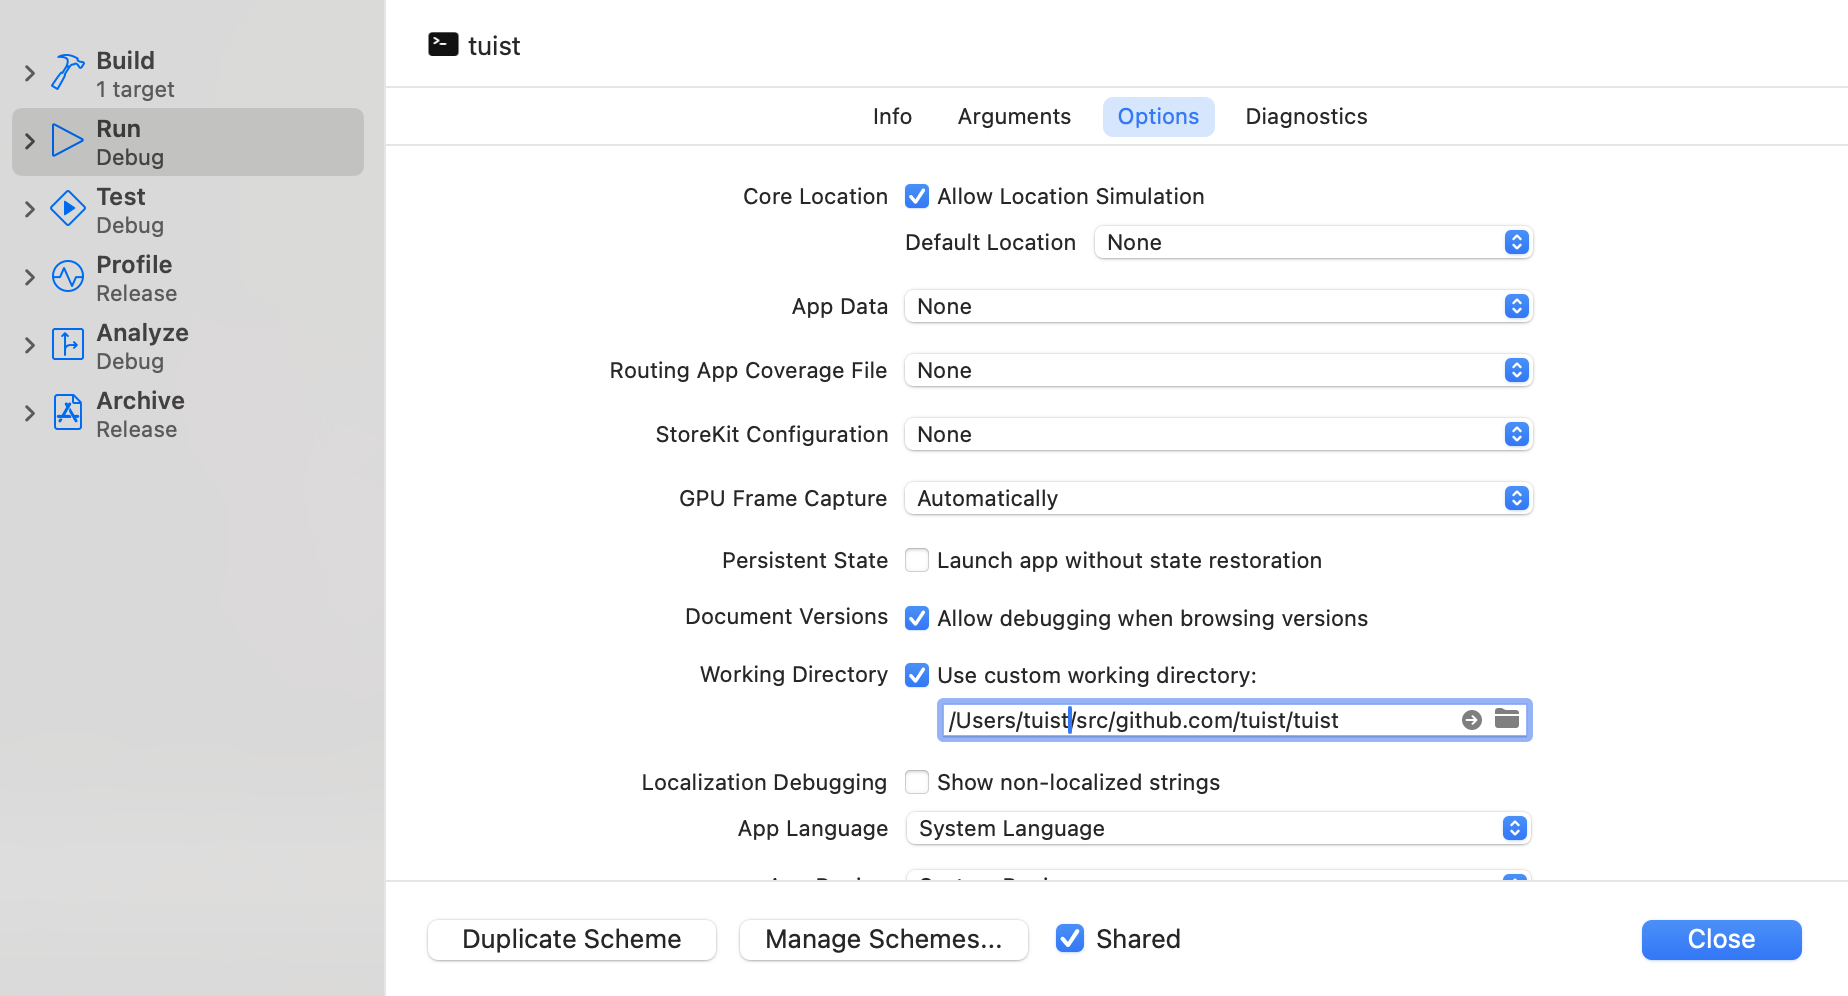
To run tuist from the generated Xcode project, edit the tuist scheme, and set the arguments that you'd like to pass to the command. For example, to run the tuist generate command, you can set the arguments to generate --no-open to prevent the project from opening after the generation.

You'll also have to set the working directory to the root of the project being generated. You can do that either by using the --path argument, which all the commands accept, or configuring the working directory in the scheme as shown below:
PROJECTDESCRIPTION COMPILATION
The tuist CLI depends on the ProjectDescription framework's presence in the built products directory. If tuist fails to run because it can't find the ProjectDescription framework, build the Tuist-Workspace scheme first.
From the terminal
You can run tuist using Tuist itself through its run command:
tuist run tuist generate --path /path/to/project --no-openAlternatively, you can also run it through the Swift Package Manager directly:
swift build --product ProjectDescription
swift run tuist generate --path /path/to/project --no-open